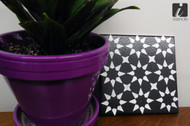
Paint your tiles with iStencils!
Posted by Katie B. on Nov 23rd 2019
Impress your guests the second they walk through your home with your stenciled tiles! You can add new life to an existing tile flooring with this easy stenciling project.
Supplies:
- iStencils Design: 94-00089 RSC seeing stars stencil (8” size)
- 6” x 6” Ceramic Tile
- Chalkboard Paint
- White Acrylic Paint
- Polyurethane Finish
- Stencil Brushes
- Foam Roller
- Repositionable Spray Adhesive

For this design we used a single ceramic tile to illustrate the steps, but this can be done on an existing floor tile as well.
Once you have all of your supplies handy, you can start! First, paint a couple of layers of the chalkboard paint onto your tile; probably three or four coats with around 20 minutes of dry time in between. For this application, a foam roller was used, which sped up the job and made the paint lay evenly.
For this tile, I chose a really pretty repeat pattern that is new on iStencils (94-00089 R SC in the 8” x 8” size). With our iStencils, we have set material sizing but if you want a custom size, let us know and we can get that quoted for you. The 8” x 8” material size is a good size because the image is going to be 6.5” at the widest point, which is just a hair larger than the tiles.
Now that the chalkboard paint has dried, you can start on the design! Apply some repositionable spray adhesive on the back of the stencil and wait a little bit for it to get tacky. Once the stencil is tacky enough, put it down and use the center star to center the design on the tile.
Now that the tile is down, you can go to town stenciling in the design! With some paints, a couple of coats are needed to get full coverage. With the white acrylic paint, around 3 coats were used.
Allow ample time for the paint to dry before you start applying the polyurethane finishing coat. Evenly spread the polyurethane over the tile, and ensure that all parts of the tile are covered, as this is going to be the coat that will seal the paint. You can apply one or two coats of the polyurethane. Personally, I am paranoid and so I applied two! You can also choose a polyurethane that is matte or gloss; for this project I used gloss.

Now you can enjoy this tile pattern whether it is on your floor, backsplash, coasters, or plant caddy!
-Katie
Happy Stenciling-iStencils

